Appearance
Pictures and text as stitches
Two dialogs turn something you already have into stitches: a picture, or a line of text. Both preview the result, and both end with it floating over the canvas for you to place.
Importing a picture
Open it with File > Import image, the picture button in the toolbar, or by dropping an image file onto the canvas. You can also paste an image from the clipboard while the dialog is open.
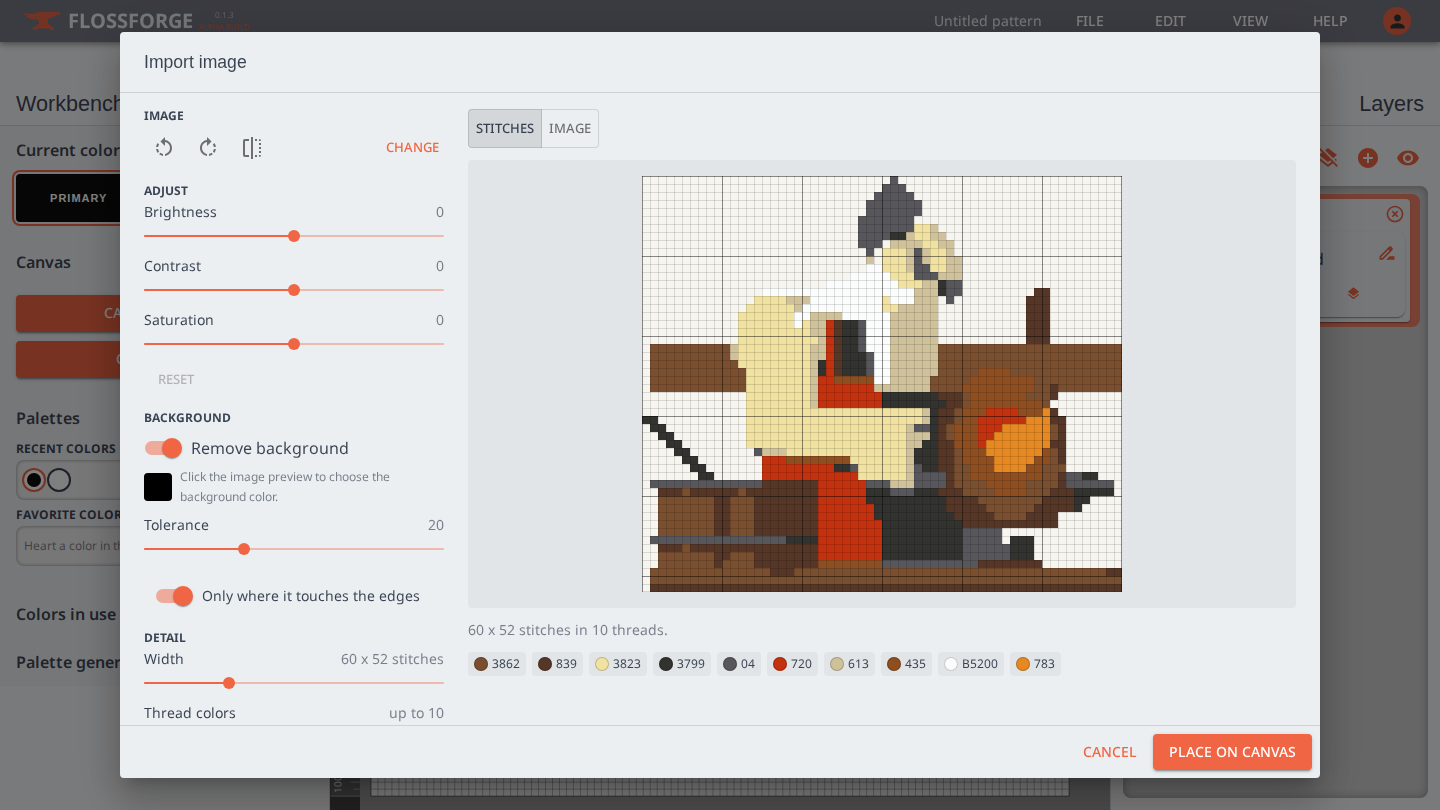
The controls on the left work from top to bottom:
- Image rotates or flips the picture.
- Adjust sets brightness, contrast and saturation.
- Background removes a background color. It starts from the most common color at the edges; click the picture preview to choose a different one. Tolerance sets how close a color must be to go, and "Only where it touches the edges" keeps matching colors inside the picture, such as white in an eye.
- Detail sets the width in stitches (the height follows the picture's proportions) and up to how many thread colors to use. Every color is matched to a DMC thread. "Clean up single stitches" removes isolated stitches, which are slow to sew and rarely add anything. Dithering scatters two threads to suggest a third, which suits photographs and rarely suits flat artwork.
The preview switches between the stitches on fabric and the adjusted picture with its removed background shown as transparent. Below it are the size, the list of threads with a stitch count each, and a warning if the result is larger than the canvas.
Adding text
Open it with File > Add text, the text button in the toolbar, or T.
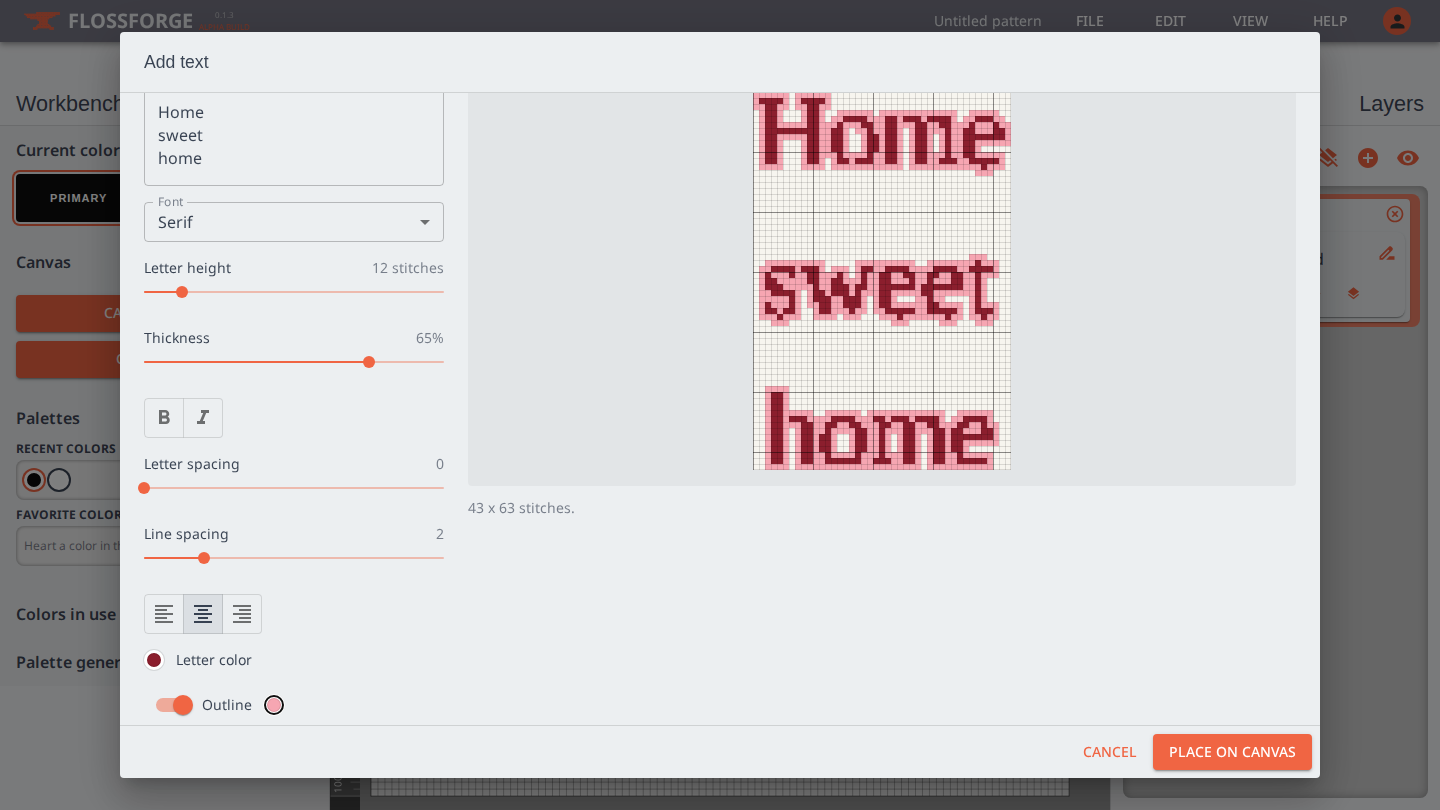
Type the text, which may run to several lines, then choose:
- A font. Pixel is a built-in 5 by 7 face that stays crisp at small sizes and scales by whole stitches. Sans serif, Serif, Monospace and Script use the fonts on your computer, sized by letter height in stitches, with a thickness control and bold and italic.
- Letter spacing, line spacing and alignment.
- The letter color, which starts as your primary color, and an optional one-stitch outline in a second color, which starts as your secondary.
The pixel font covers the plain keyboard characters. Anything else shows as a question mark.
Placing the result
"Place on canvas" closes the dialog and floats the stitches over the grid. Drag them into position, or nudge them with the arrow keys (Shift moves ten stitches at a time). Choose New layer or Current layer, then press Place or Enter. Stitches that fall outside the grid are left off.
Back, or Esc, returns to the dialog with every setting as you left it, so you can try another width or another font. Cancel closes both.