

Appearance
Your first pattern
This walks through a small pattern once, end to end. It takes about ten minutes.
1. Open a canvas
Sign in and choose Blank Canvas on the home page. You get a grid of stitches with the Workbench on the left, where colors live, and the Layers panel on the right.
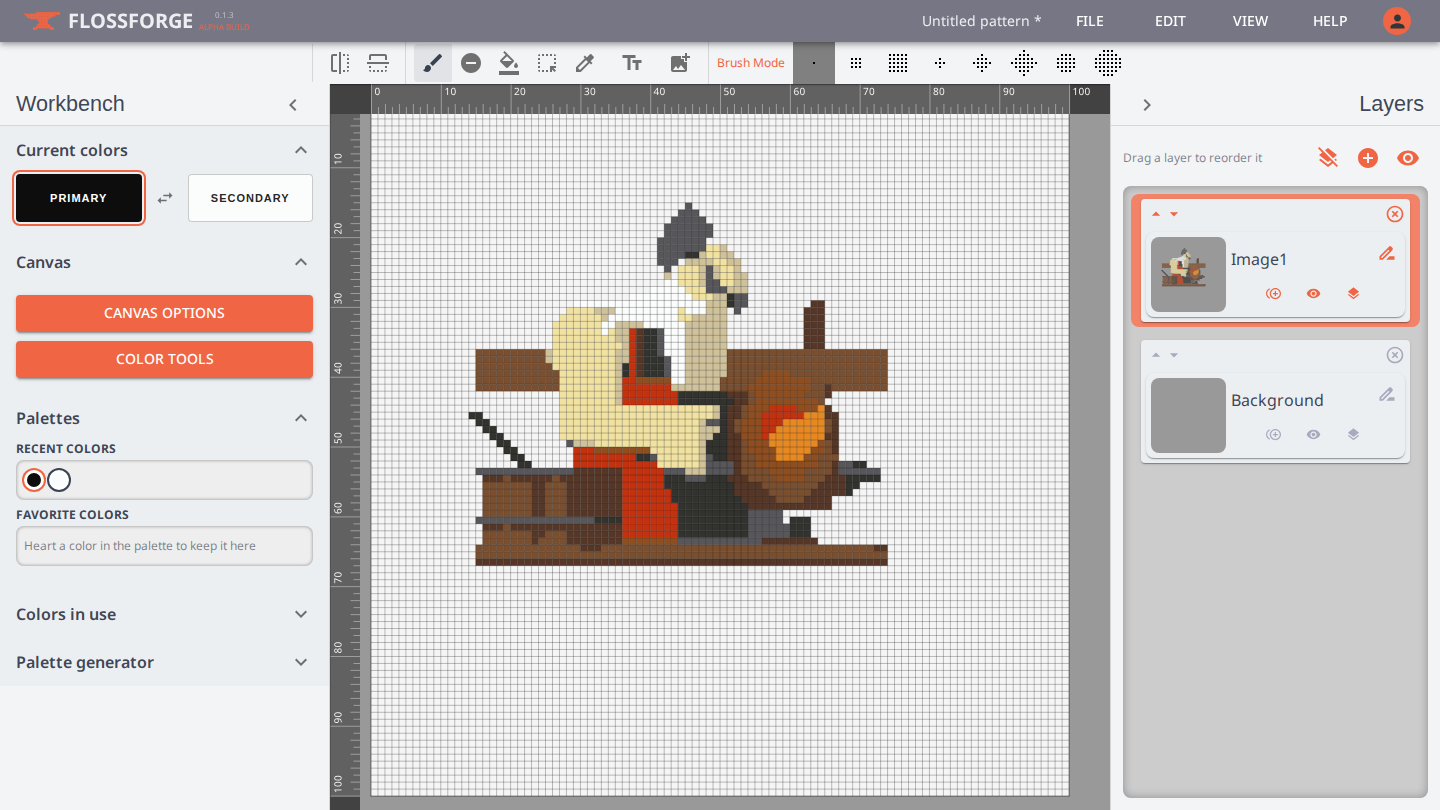
The grid starts at 100 by 100 stitches. Under Canvas in the Workbench you can pick another size, and the Stitch Count sets how large each square is drawn on your screen. Rulers along the edges count stitches, and a heavier line falls every ten.
2. Pick a color
The two swatches under Current colors are your primary and secondary colors. Click the active one to open a picker: choose from the wheel, type a hex value, or choose a thread from the DMC list further down the Workbench. The closest DMC thread to whatever you have chosen is named beside the picker.
3. Draw
The brush is selected to begin with. Click to place a stitch, or drag to draw a run of them. The other tools sit in the toolbar above the canvas and each has a single key:
| Tool | Key | What it does |
|---|---|---|
| Brush | B | Paints stitches in the primary color. |
| Eraser | E | Removes stitches. |
| Fill | G | Fills a connected area of one color. |
| Select | M | Drags out a rectangle you can move, copy, cut or delete. |
| Eyedropper | I | Picks a color up off the canvas, then returns you to the tool you had. |
If the design is symmetrical, turn on one or both of the mirror buttons at the left of the toolbar. Every stroke is then repeated across the middle of the grid, and Undo takes the stroke and its copies back together.
4. Add a picture or some words
You do not have to draw everything yourself. File > Import image opens a picture and turns it into stitches, and File > Add text (or T) does the same for a line of text. Both show a preview, and both end with the result floating over the canvas for you to drag into place. Pictures and text as stitches has the details.
5. Save
Press Ctrl+S or choose File > Save, and give the pattern a name. From then on the same key saves it in place. Saved patterns are listed on the home page with a small preview.
6. Print a chart
Choose File > Export pattern (PDF). Give it a title, choose your fabric count, how many strands you stitch with and your paper size, and whether the chart squares should be printed in thread colors or as black and white symbols. The PDF has a cover with the finished size, a thread key with skein estimates, and the chart.
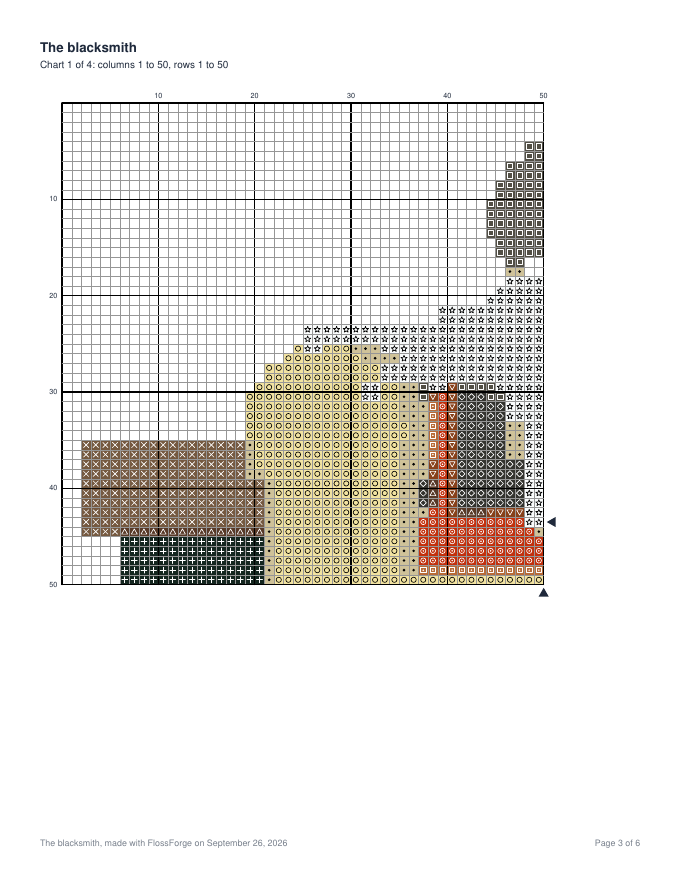
That is the whole loop. The rest of this guide goes through each part in more depth, starting with the canvas and tools.